Navajo Nation Diary

Adding The First Round of Blocks

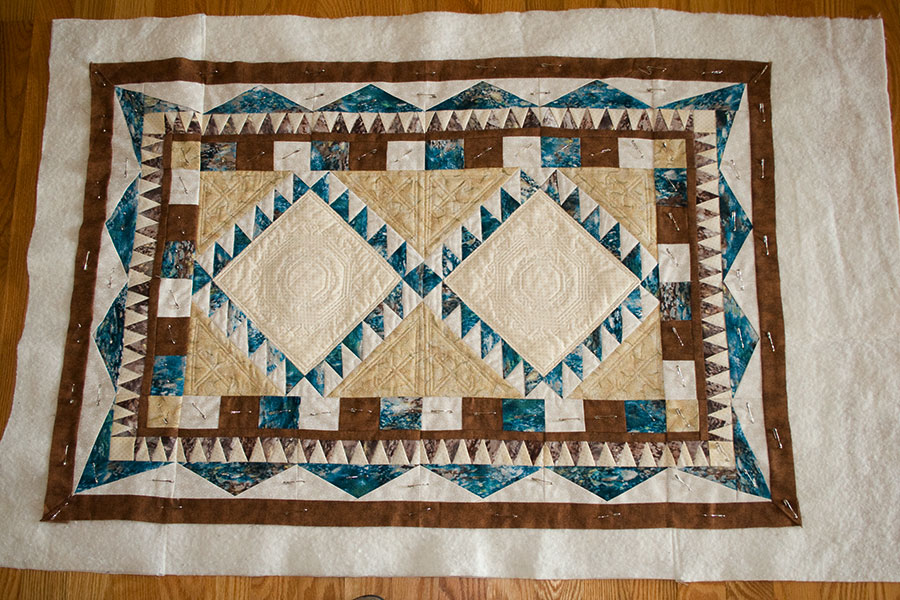
I’ve completed assembling the blocks for the first round. I sewed together the blocks making 4 rows (one for each side). Two rows contained 2 middle blocks and 2 corner blocks. The other two rows contained 4 middle blocks each. To the outer side of each row I added a 2-inch strip (40-inches long) of brown fabric for the outer border of this round. I centered the strip on the outside and left the excess tails on so I can miter the corners after it is all pinned together.First I joined the rows with four middle blocks. I placed the blocks on top of the center section of the quilt right sides together and sewed together using a 1/4 seam allowance Matching the the block row edge to the top quilt edge (not the backing). After sewing the seam, I trimmed away the excess batting and backing from the seam allowance. Leaving the excess on while sewing this seam, makes feeding the layers through the machine much easier and reduces puckering. Then I flipped the quilt over and placed the backing (cut several inches larger than necessary) on the back of the quilt right sides together. Then I sewed together over the seam I made with the front side.
With the front and back sewn to the quilt but still right sides together (not yet opened), I a butted the batting strip (again cut several inches wider and longer than the block row) next to the seem allowance and zigzaged together with no overlap (this eliminates any bulging that would have resulted with sewing into seam allowance. Then I flipped open the front and backs and pinned together. I repeated the process for the other three sides. Once all the sides were sewn on and pinned over, I mitered the borders, pinned into place and trimmed off the excess brown strip tails. The miter will be sewn down during the quilting process.This same process will be used each time I add a round to the quilt. And, with each round, I will cut the backing and batting several inches wider and longer than necessary. I learned the hard way that it is much easier to assemble and quilt and there is no danger of running short when I add subsequent rounds.


Related Articles

Leave a Reply

Your email address will not be published. Required fields are marked *

This site uses Akismet to reduce spam. Learn how your comment data is processed.

Back to top button